
A Golden Reef Tank (v2)
- Thread starter halmus
- Start date
TheRealChrisBrown;677214 said:
Everything looks awesome! CONGRATS!
Has the cycle started?
Has the cycle started?
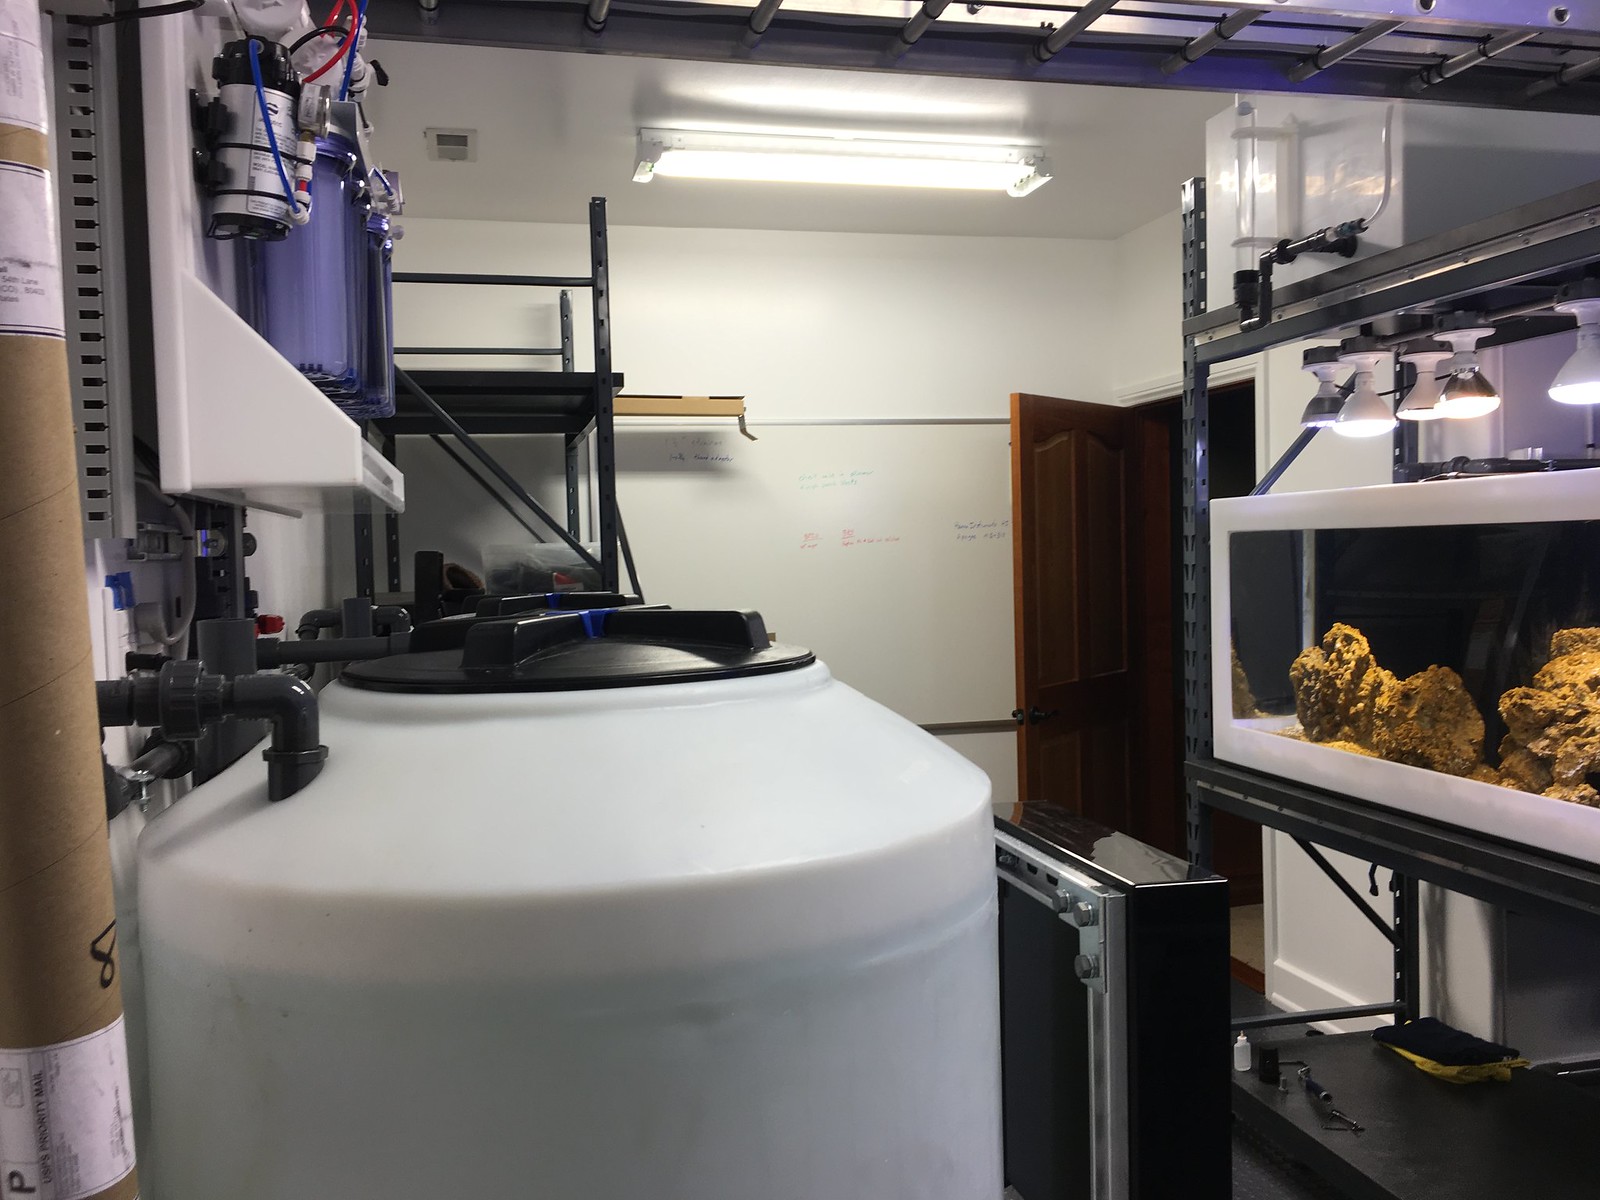
As far as cycling, I still need to get test kits. I have a lot of work left to do outside of the tank. Also, I started out with quite a bit of BRS Pukani. So, I would expect be to leaching out crud from the rock for a while. My plan is to keep moving forward with the rest of the tank and really start the serious testing once I'm closer to stocking this with something. Right now, the water is visibly hazy and yellowish. That's just day 1 running all dry rock. I'm sure the water color (and smell) will get worse before it gets better.
I don't know if that's bad practice, but I've got months of work left to do; I'm planning on just doing periodic water changes and let the tank do it's thing. I will probably grab some chaeto from a shop at some point to start getting the refugium going.
NickP;677231 said:
Looking great bro! Bet your feeling the itch now!
Luckily, my drive to do things right is winning out and I'm more focused on just finishing this major project. I still have some cabinet work to finish to call this complete after the tank is on cruise control.
Then, it's on! Start stocking this tank!
Etoimos;677232 said:
Your rock work looks great! I love all the depth you got with the 4" tank. It just confirmed that I'll have to go with a 36" depth on the eventual tank at the new house. Your mixing station is also a thing of beauty. lol
Before I ordered the tank, I made a 3D mock-up out of thin sticks of wood. I was able to test whether I could reach the bottom and middle of the tank with various dimensions. It's a lot easier to picture the tank when you have a visual reference. Cardboard and cheep sticks of wood are your friend when you're trying to plan out a custom tank. Plus, you can use your model to make sure the tank and stand will fit into your house.
SynDen
Administrator
Staff member
M.A.S.C Club Member
M.A.S.C. B.O.D.
M.A.S.C President
M.A.S.C Webmaster
Alright water ftw! and man I wish I could get my wife to participate in the tank build, she always gives me dirty looks if I ask her to help with anything related to the tank. lol
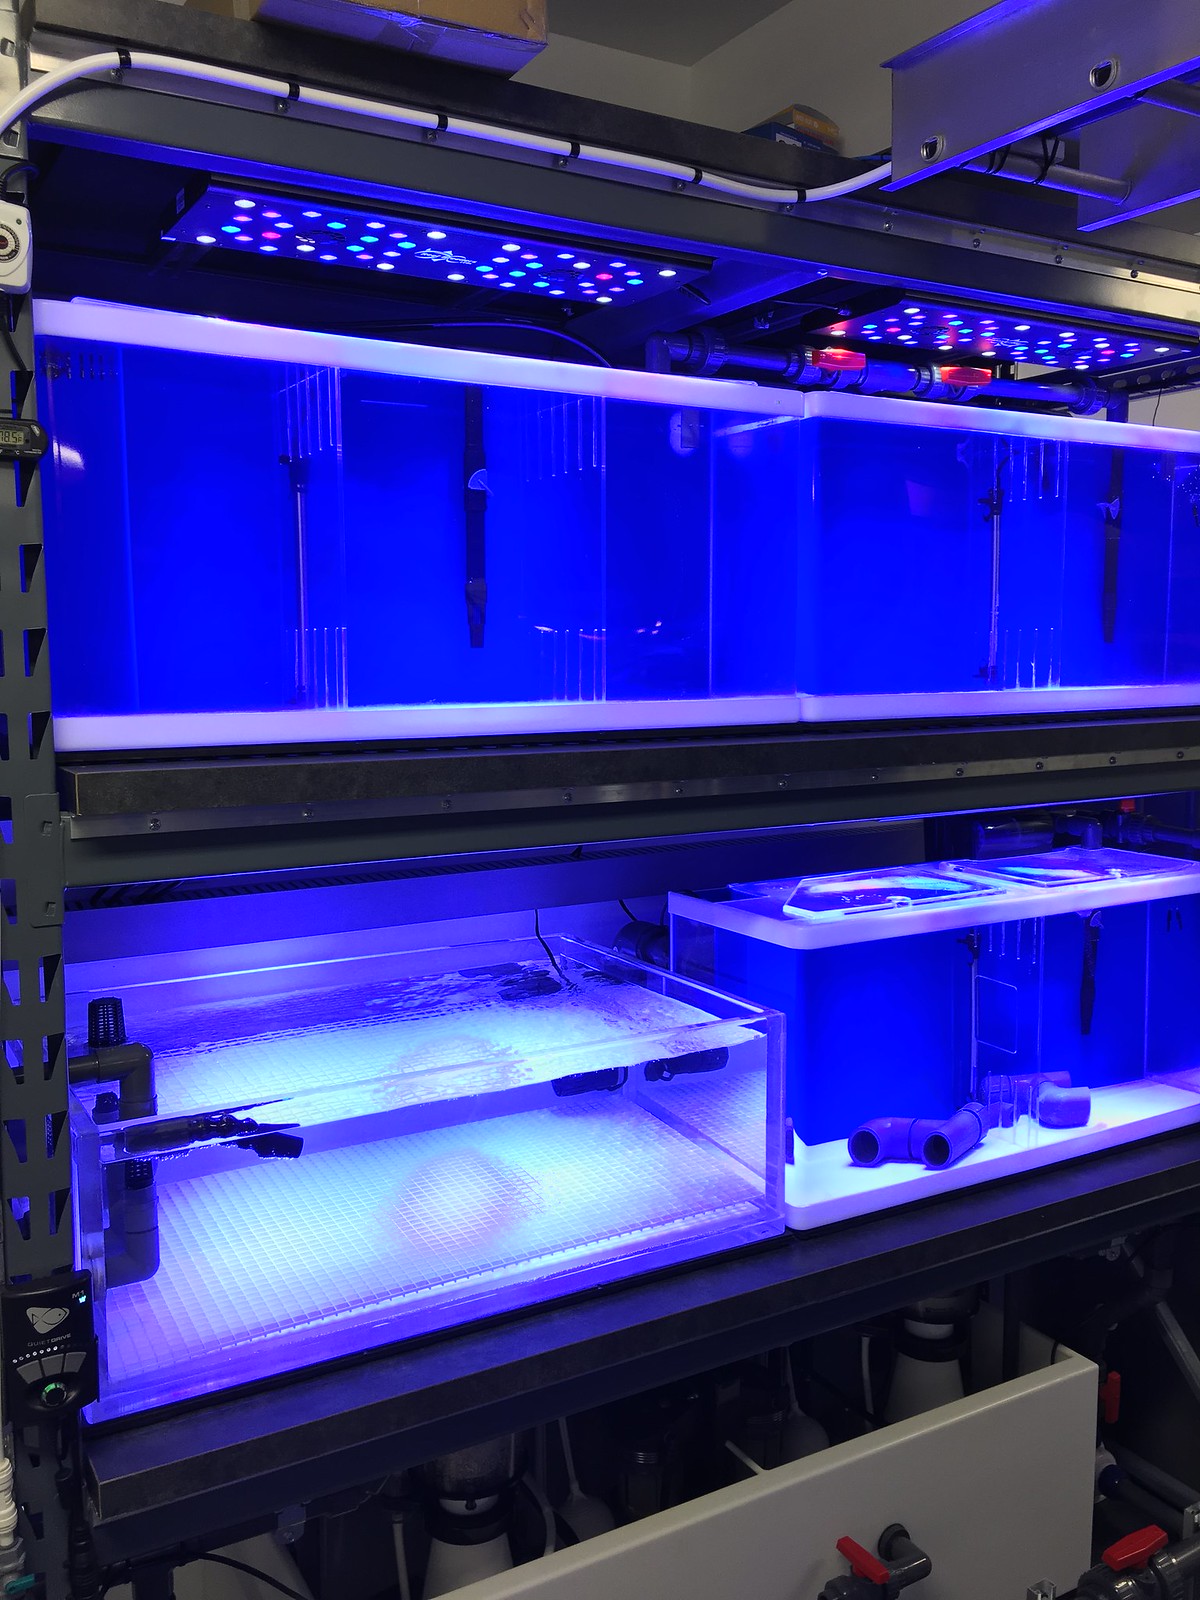
Rock work looks great. Love the pillars and the openness of it. I know what you mean about wanting a bigger footprint once you start putting rock in. It really does fill it up fast, even on a large tank. Very hard to keep it looking lite and keep it off the glass. Nice work.
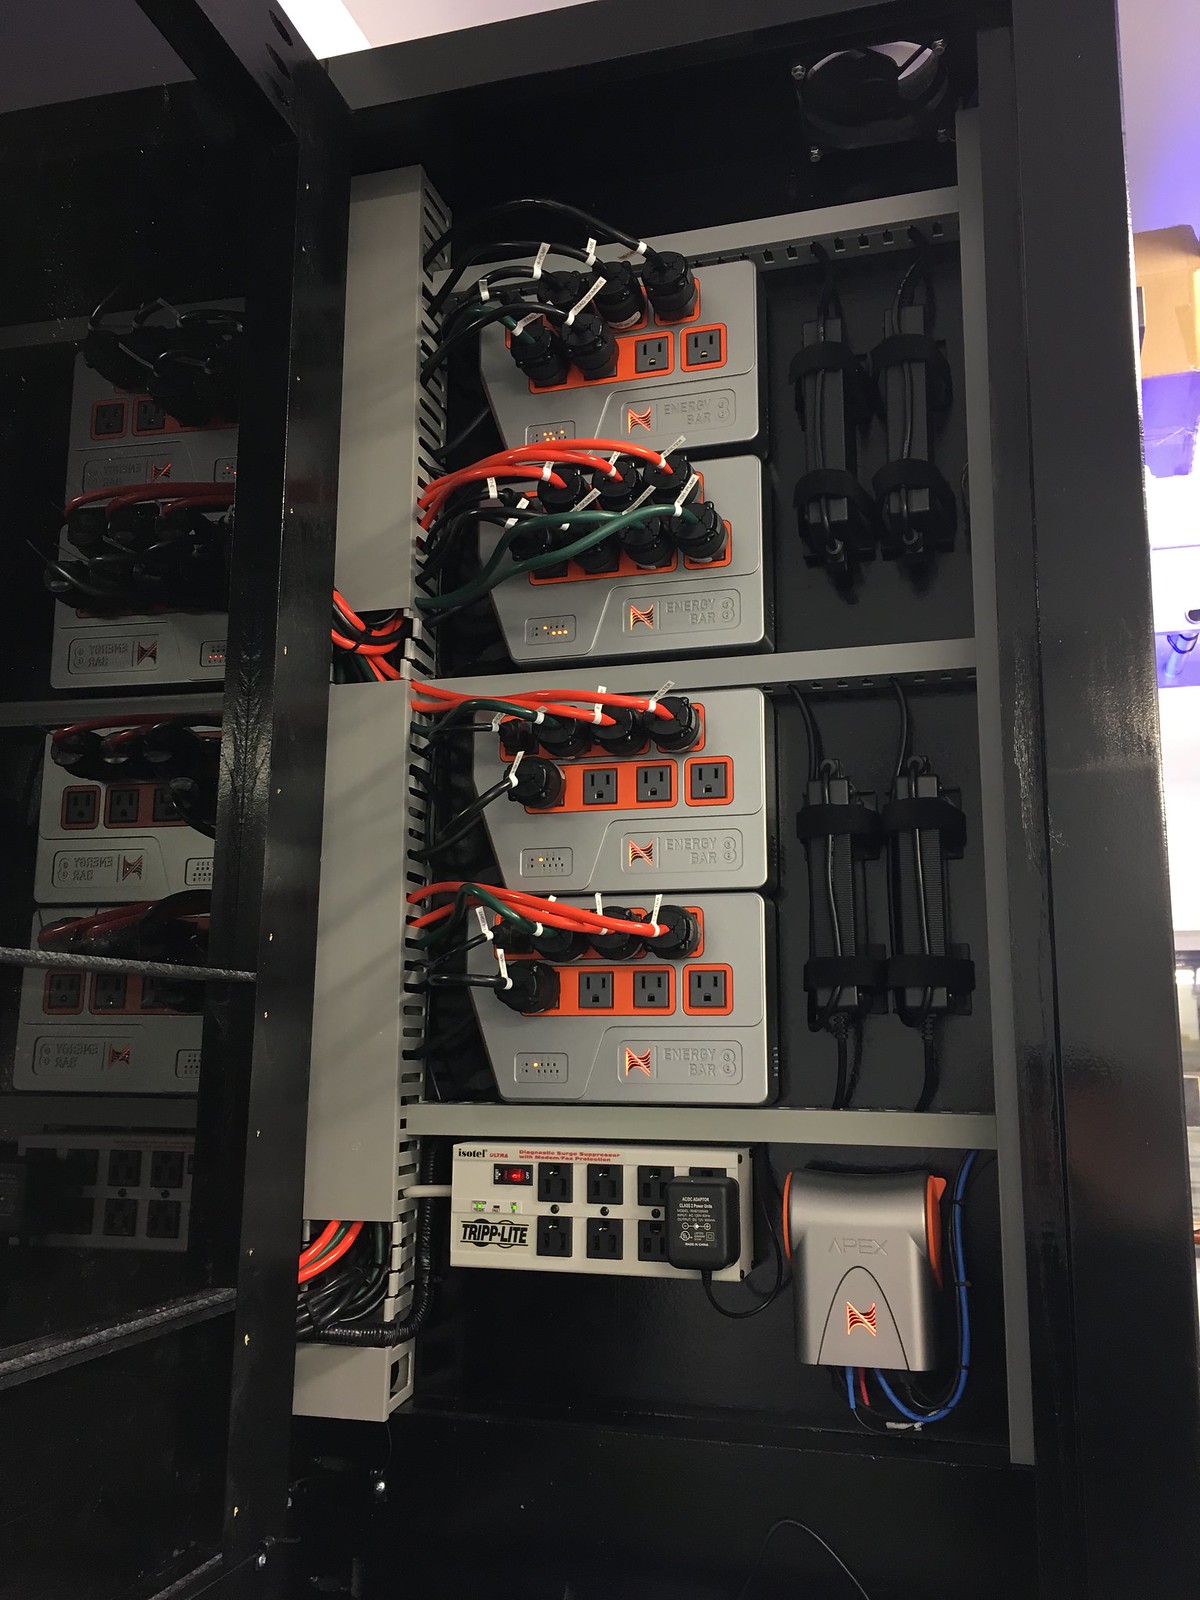
I also have been trying to figure out how to fit in the controller for my tank. I think Likely I will just use it for lights, and emergency backup stuff most likely, everything else is a surge protected plug with a manual switch as well. I am using studio and lighting bars with surge protectors. What are you using? I see several 4 outlet boxes around, which ones are those? I think I could use a few more")
Rock work looks great. Love the pillars and the openness of it. I know what you mean about wanting a bigger footprint once you start putting rock in. It really does fill it up fast, even on a large tank. Very hard to keep it looking lite and keep it off the glass. Nice work.
I also have been trying to figure out how to fit in the controller for my tank. I think Likely I will just use it for lights, and emergency backup stuff most likely, everything else is a surge protected plug with a manual switch as well. I am using studio and lighting bars with surge protectors. What are you using? I see several 4 outlet boxes around, which ones are those? I think I could use a few more
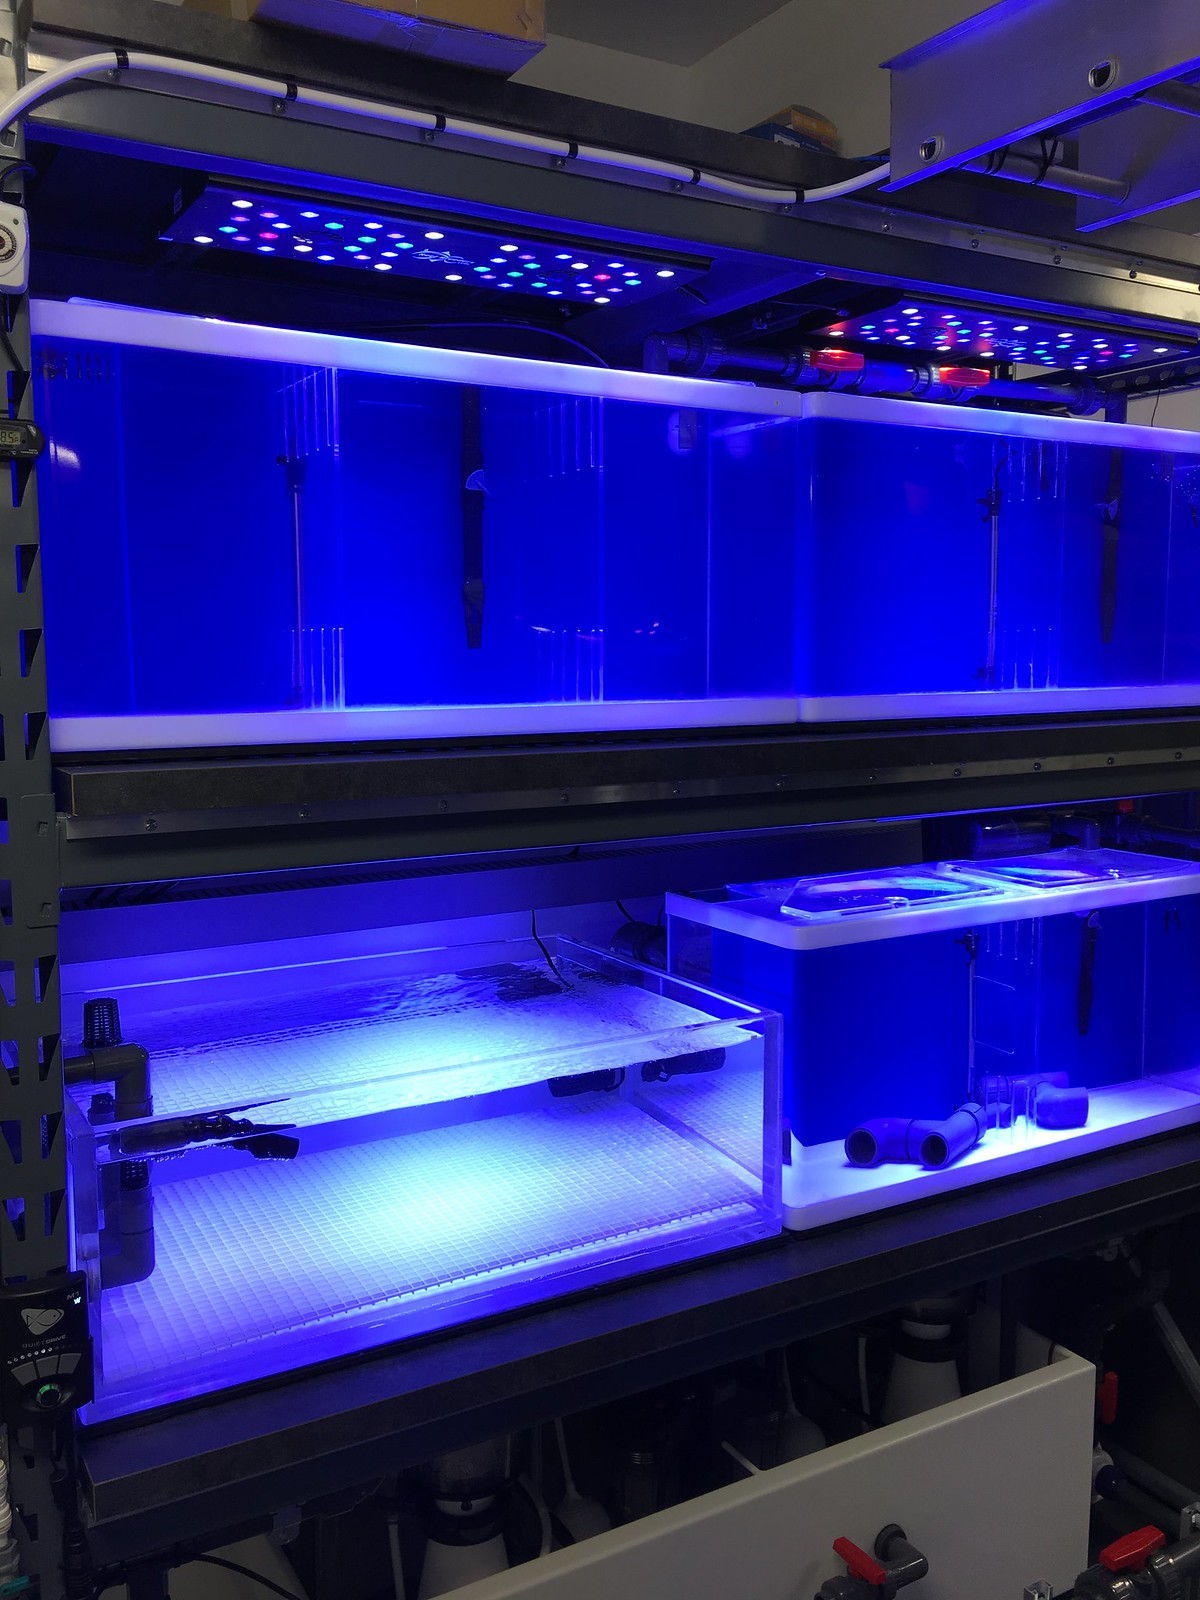
Thanks SynDen! My wife actually loves helping. She really got into the rockwork! I got yelled at for glueing together a few pieces without her around. She wasn't there for artistic oversight. There were a few times arranging things that I had to lay down the law. The rule of thumb was stretch your hand out pinky and thumb. If you can touch the glass and rock at the same time, it had to change. It was painful restricting ourselves like that. But I hate cleaning the glass when you're fighting rock and coral. I want plenty of room for growth.
I used EpoPuddy to bond the rock. I used so much that the guy on Amazon sent me a free EpoPuddy T-shirt. It's a hideous yellow color and about five sizes too big but it was still a nice surprise when I opened the box and nice of the guy to send the bonus. I got a good laugh when I tried it on.
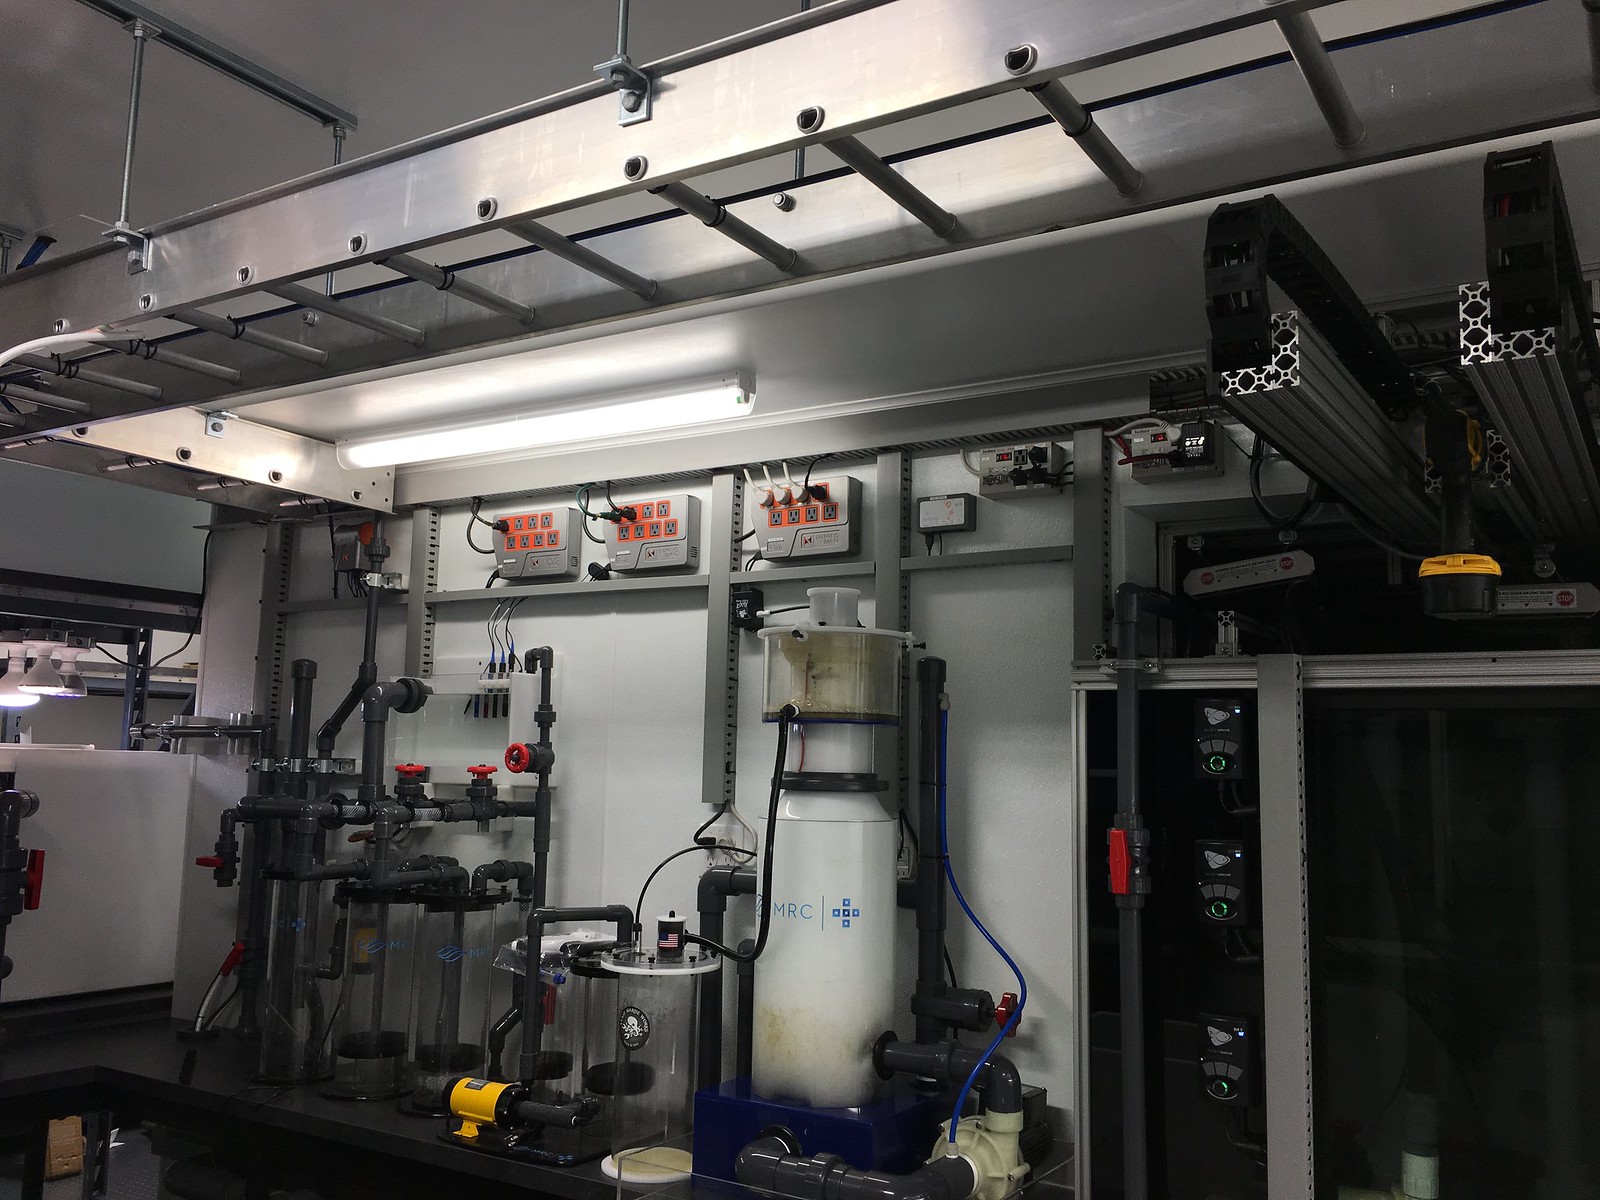
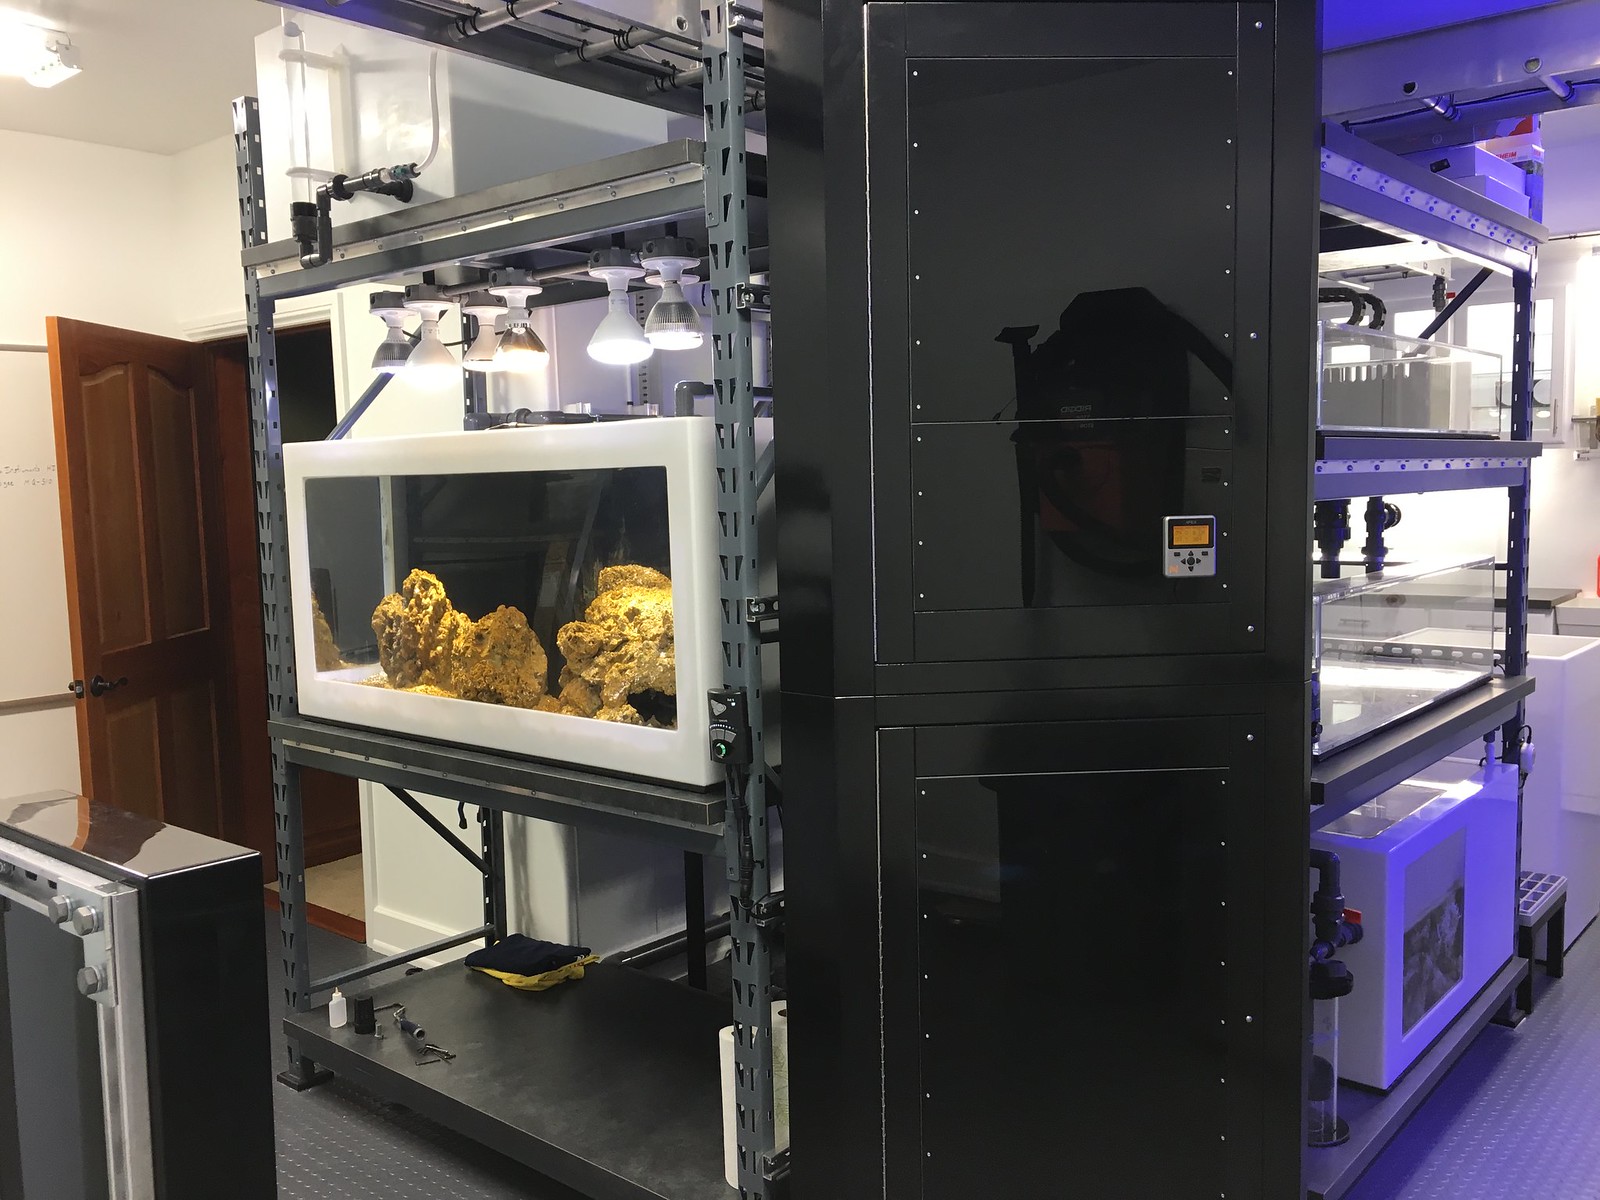
I'm using Tripp-Lite Isobars for power strips. They're more expensive but have a nice mounting solution. I use them at work and I'd rather spend more on a strip when I've got 4 Radions plugged in and 4 Vortechs. I doubt they're meant to be used near water but I am mounting them high on the wall or in shielded areas safe from spray or splashing.
Side note: I plugged in the skimmer today and an hour later I'm already getting crud out. I have to keep my eye on it. I'm not sure where it will settle in and I don't have any safety measures in place yet in case it overflow.
I used EpoPuddy to bond the rock. I used so much that the guy on Amazon sent me a free EpoPuddy T-shirt. It's a hideous yellow color and about five sizes too big but it was still a nice surprise when I opened the box and nice of the guy to send the bonus. I got a good laugh when I tried it on.
I'm using Tripp-Lite Isobars for power strips. They're more expensive but have a nice mounting solution. I use them at work and I'd rather spend more on a strip when I've got 4 Radions plugged in and 4 Vortechs. I doubt they're meant to be used near water but I am mounting them high on the wall or in shielded areas safe from spray or splashing.
Side note: I plugged in the skimmer today and an hour later I'm already getting crud out. I have to keep my eye on it. I'm not sure where it will settle in and I don't have any safety measures in place yet in case it overflow.
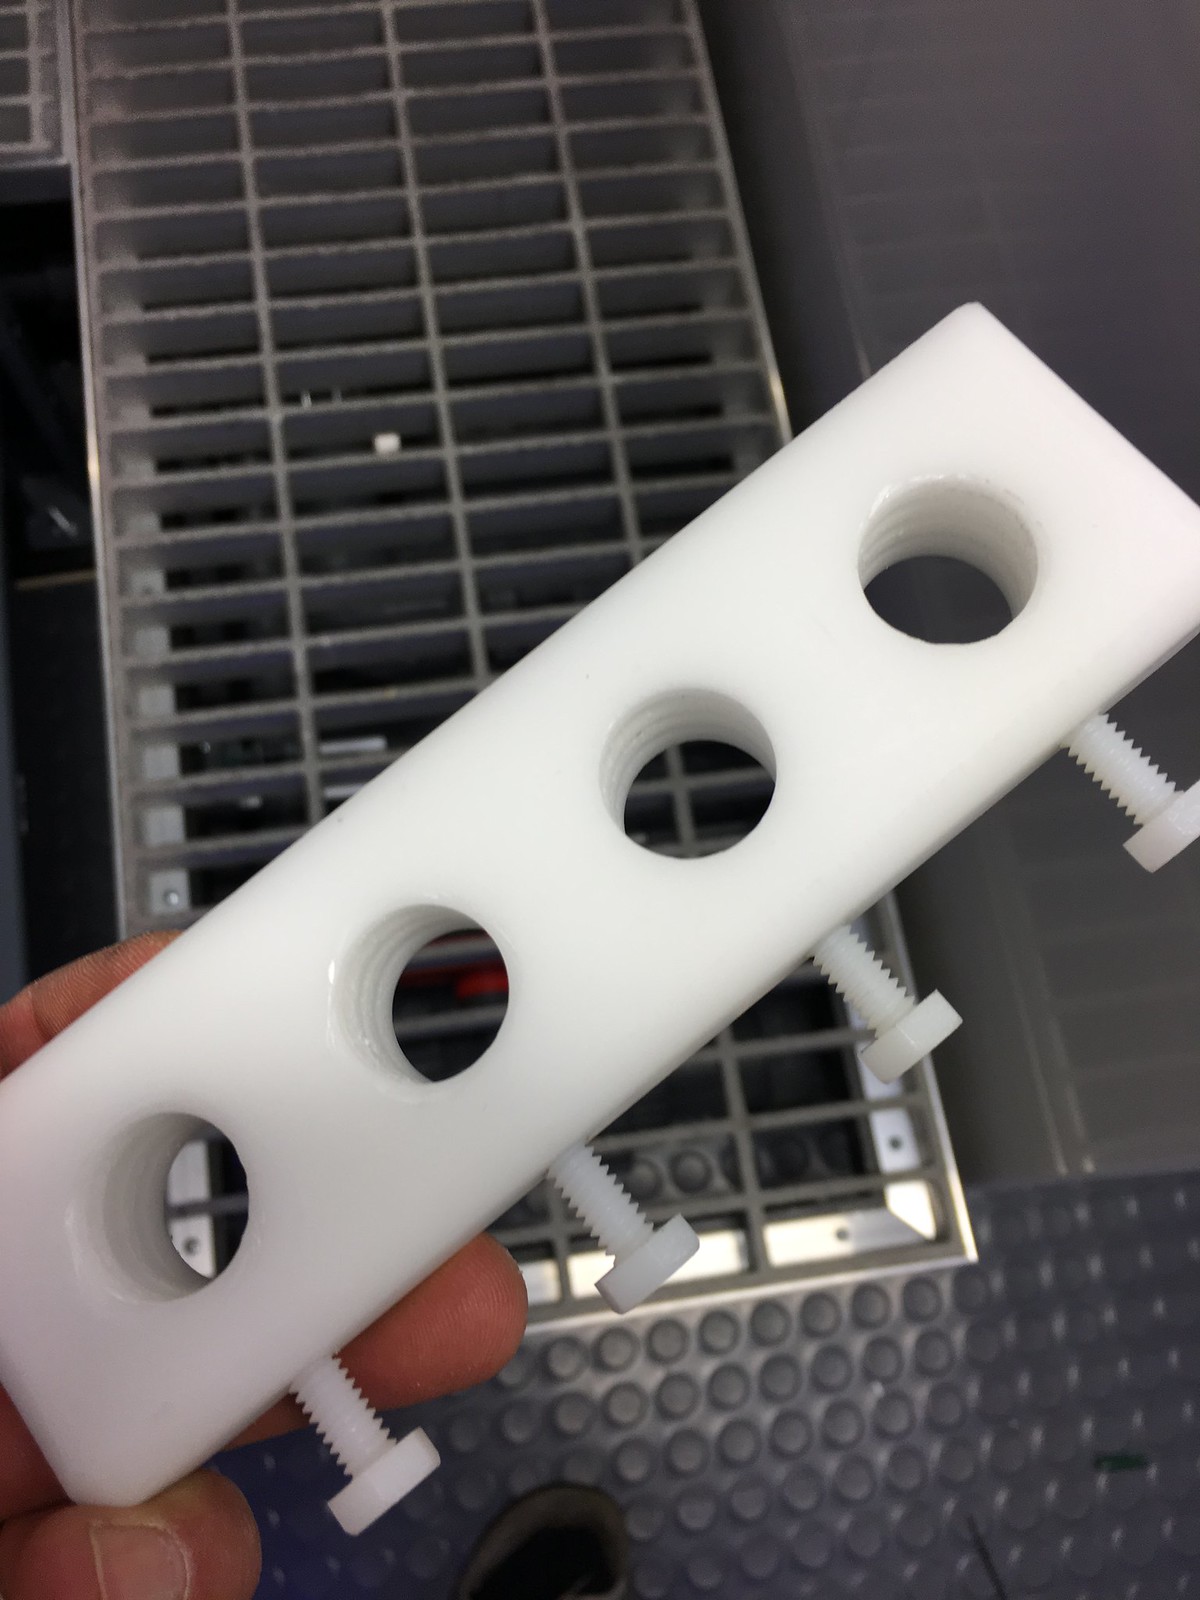
I picked up the Neptune Apex system for the display tank and for the QT systems. I've spent the last month focusing on prepping for and installing these systems. After two days of finishing up minor issues and cleaning the filtration area, I can finally do another pan of the room. I had a few minor issues like a J-Guest fitting leaking due to a misaligned O-ring, I have both the display and QT tanks running on cruise control. Those minor issues are taken care of.
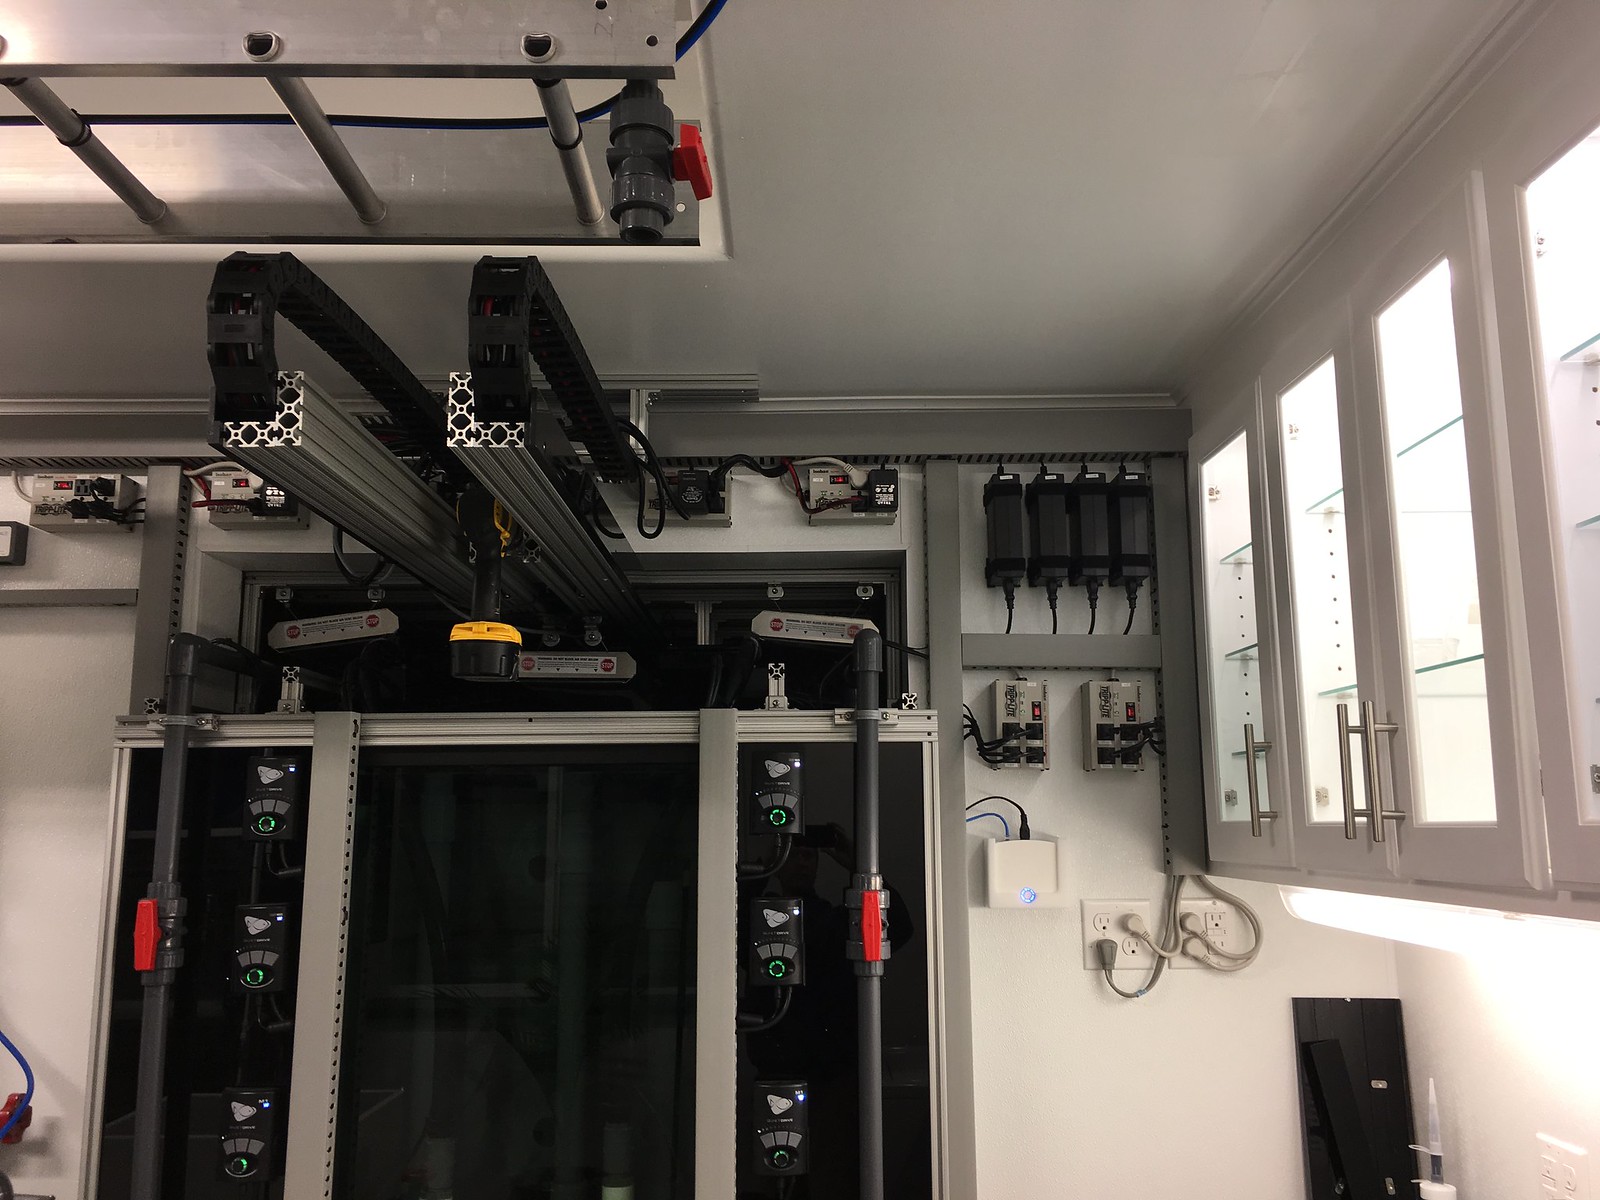
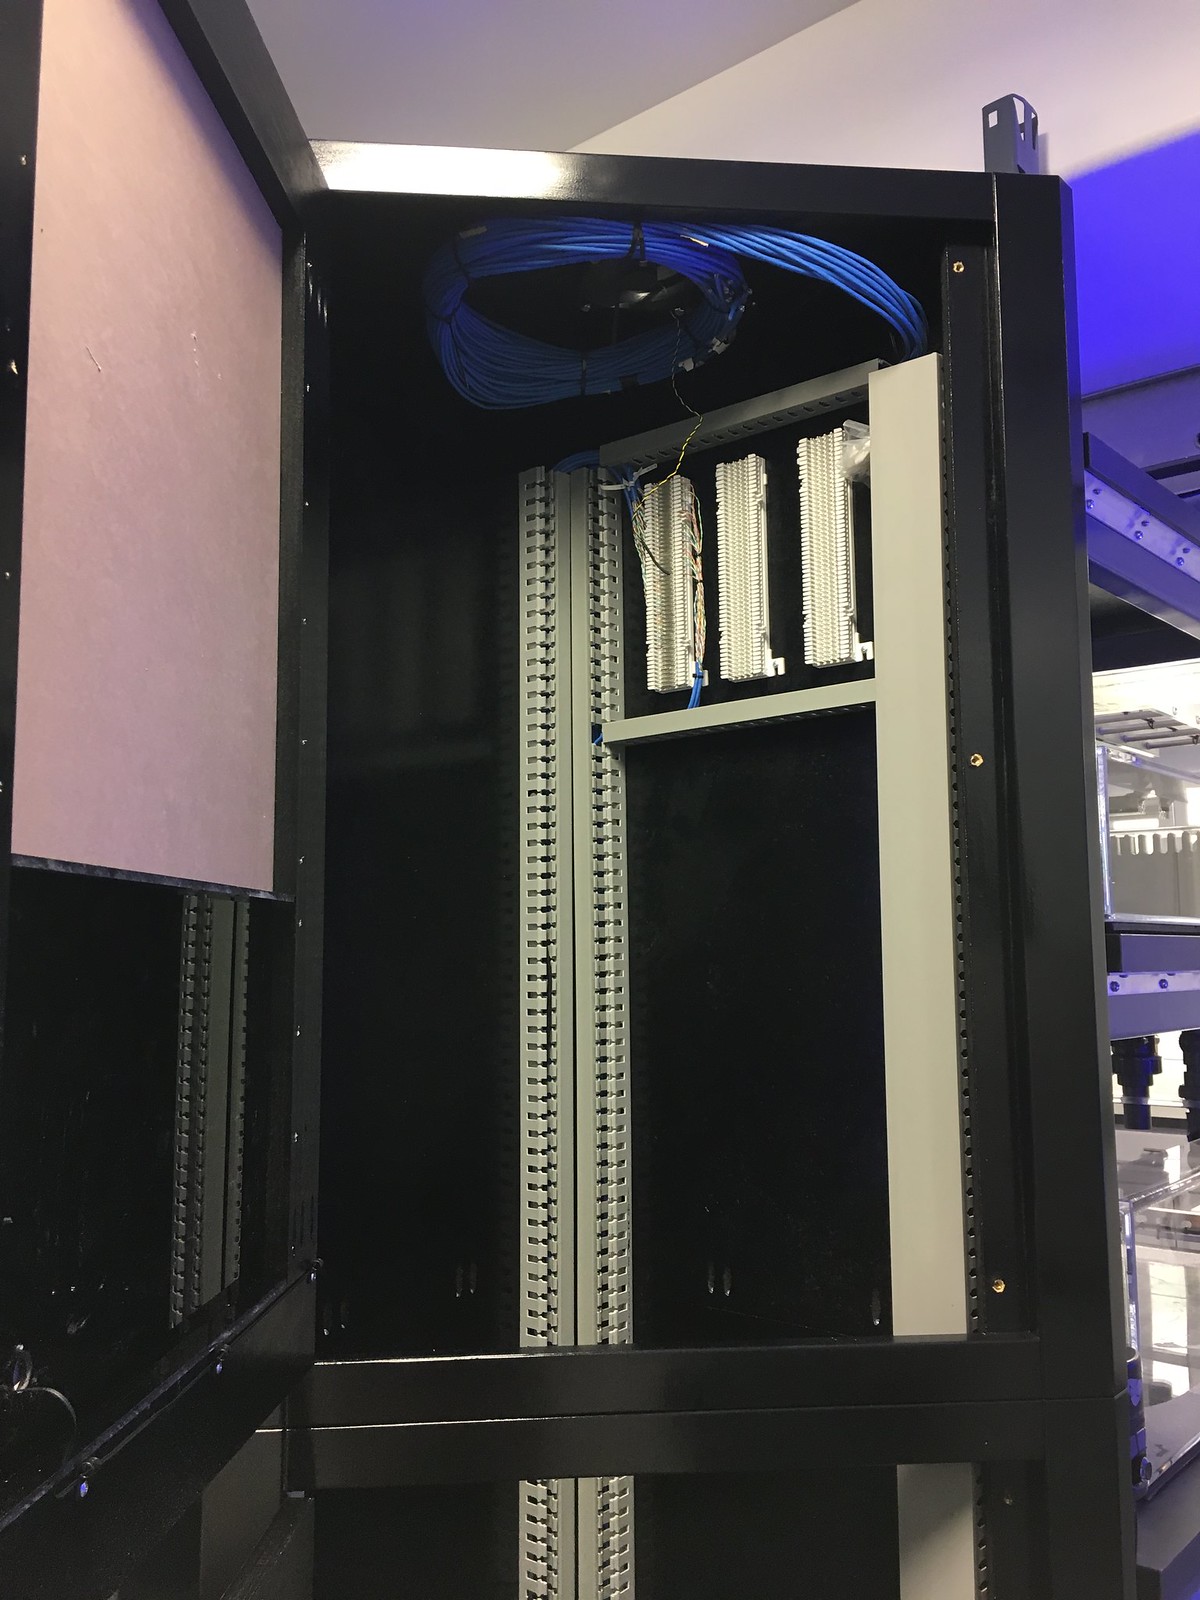
I built another cabinet for the Energy Bars that support the QT systems. Like a lot of aspects of this build, I've tried to leave things modular and easily modifiable. I still need to build holders for the ReefBreeder light remote controls. They will be mounted on the second panel up. I will eventually add input buttons, switches, and/or output light indicators as needed to these panels that interface to the Apex. For example, I might add a large red "EMERGENCY STOP" button. I will be adding a cheep tablet to the other electronics cabinet that focuses on the display system. I might end up adding a cheep tablet to this cabinet so that I can tweek the QT system quickly and easily. For now, I'm going to spend some time working with things as they are and figure out exactly how I end up using the systems over time before making major changes or additions.
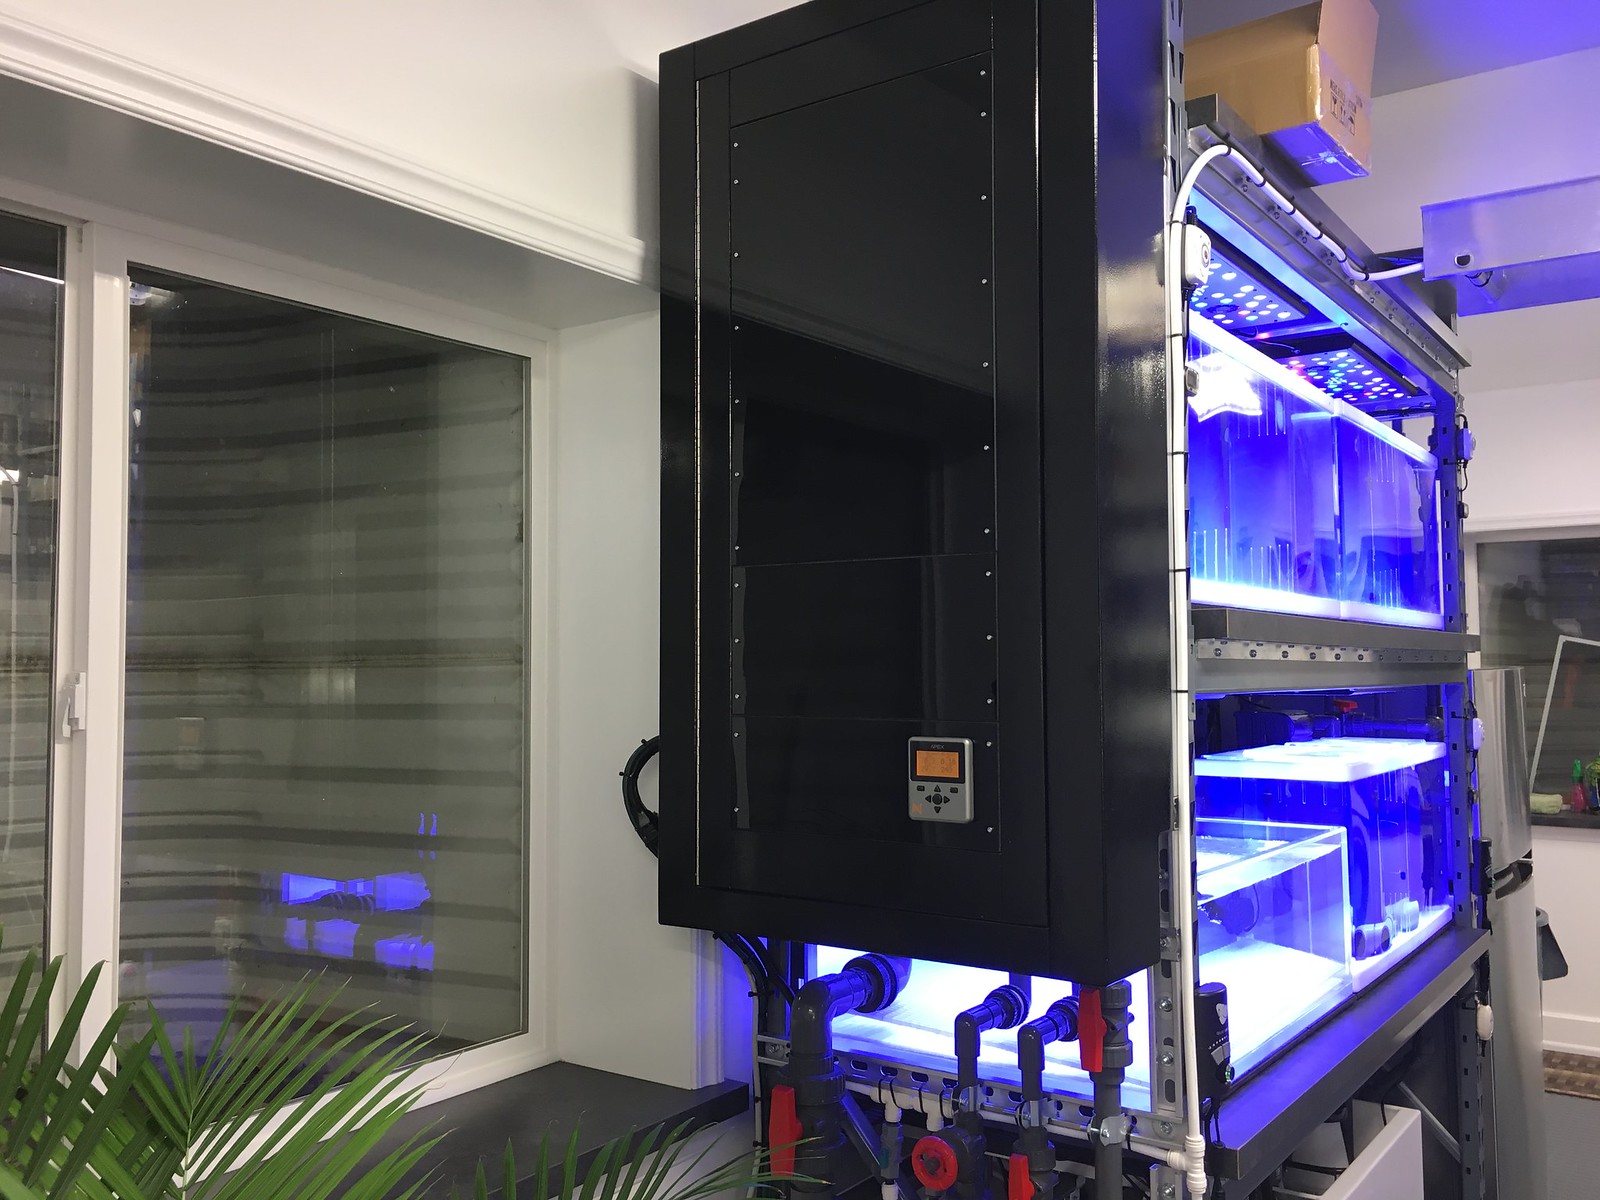
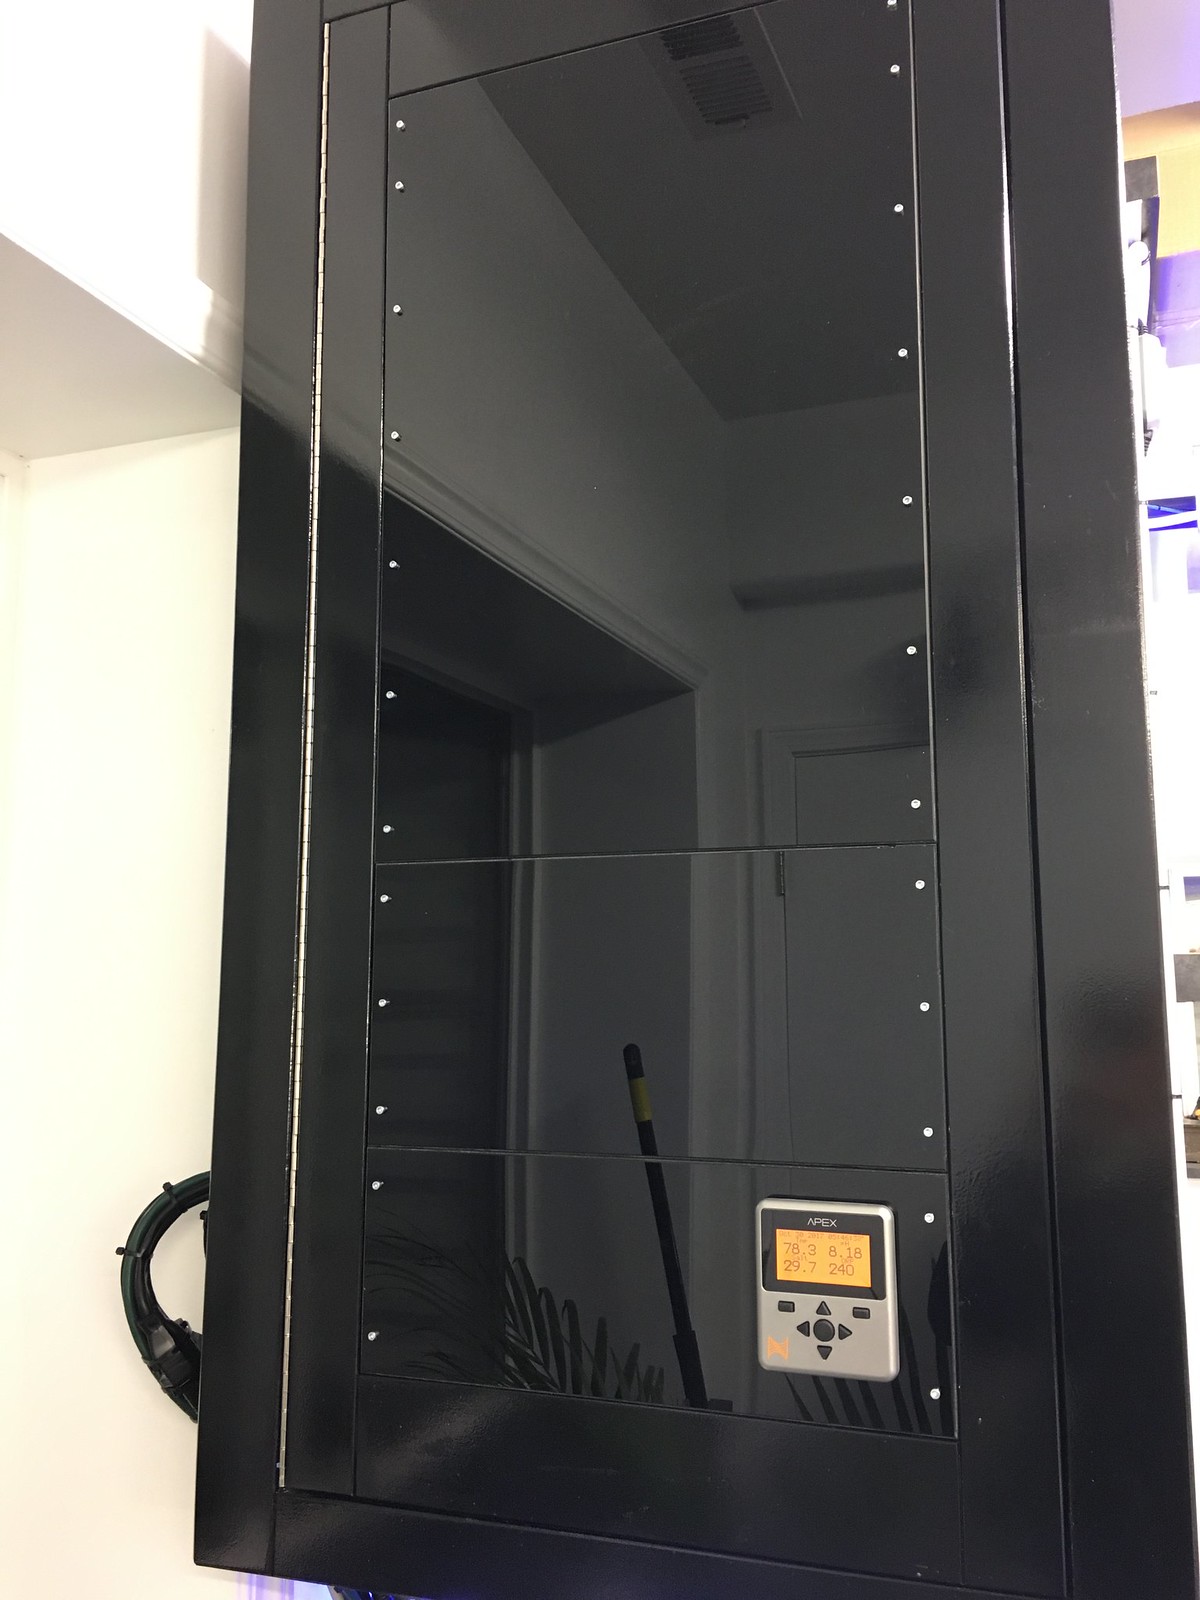


The large cabinet for misc electronics has been prepped and sealed up. I will be mounting a tablet next to the Apex display head. Long term, I will be interfacing all of the other electronics I plan on building into this cabinet. I purposely built this cabinet larger than needed so that I can easily expand as needed.

I installed some equipment from Avast Marine on the MRC skimmer. I'm really impressed with their products and highly recommend them! I am considering ordering some more of their pressure sensors to use as high/low water level indicators.

I installed some equipment from Avast Marine on the MRC skimmer. I'm really impressed with their products and highly recommend them! I am considering ordering some more of their pressure sensors to use as high/low water level indicators.
SynDen
Administrator
Staff member
M.A.S.C Club Member
M.A.S.C. B.O.D.
M.A.S.C President
M.A.S.C Webmaster
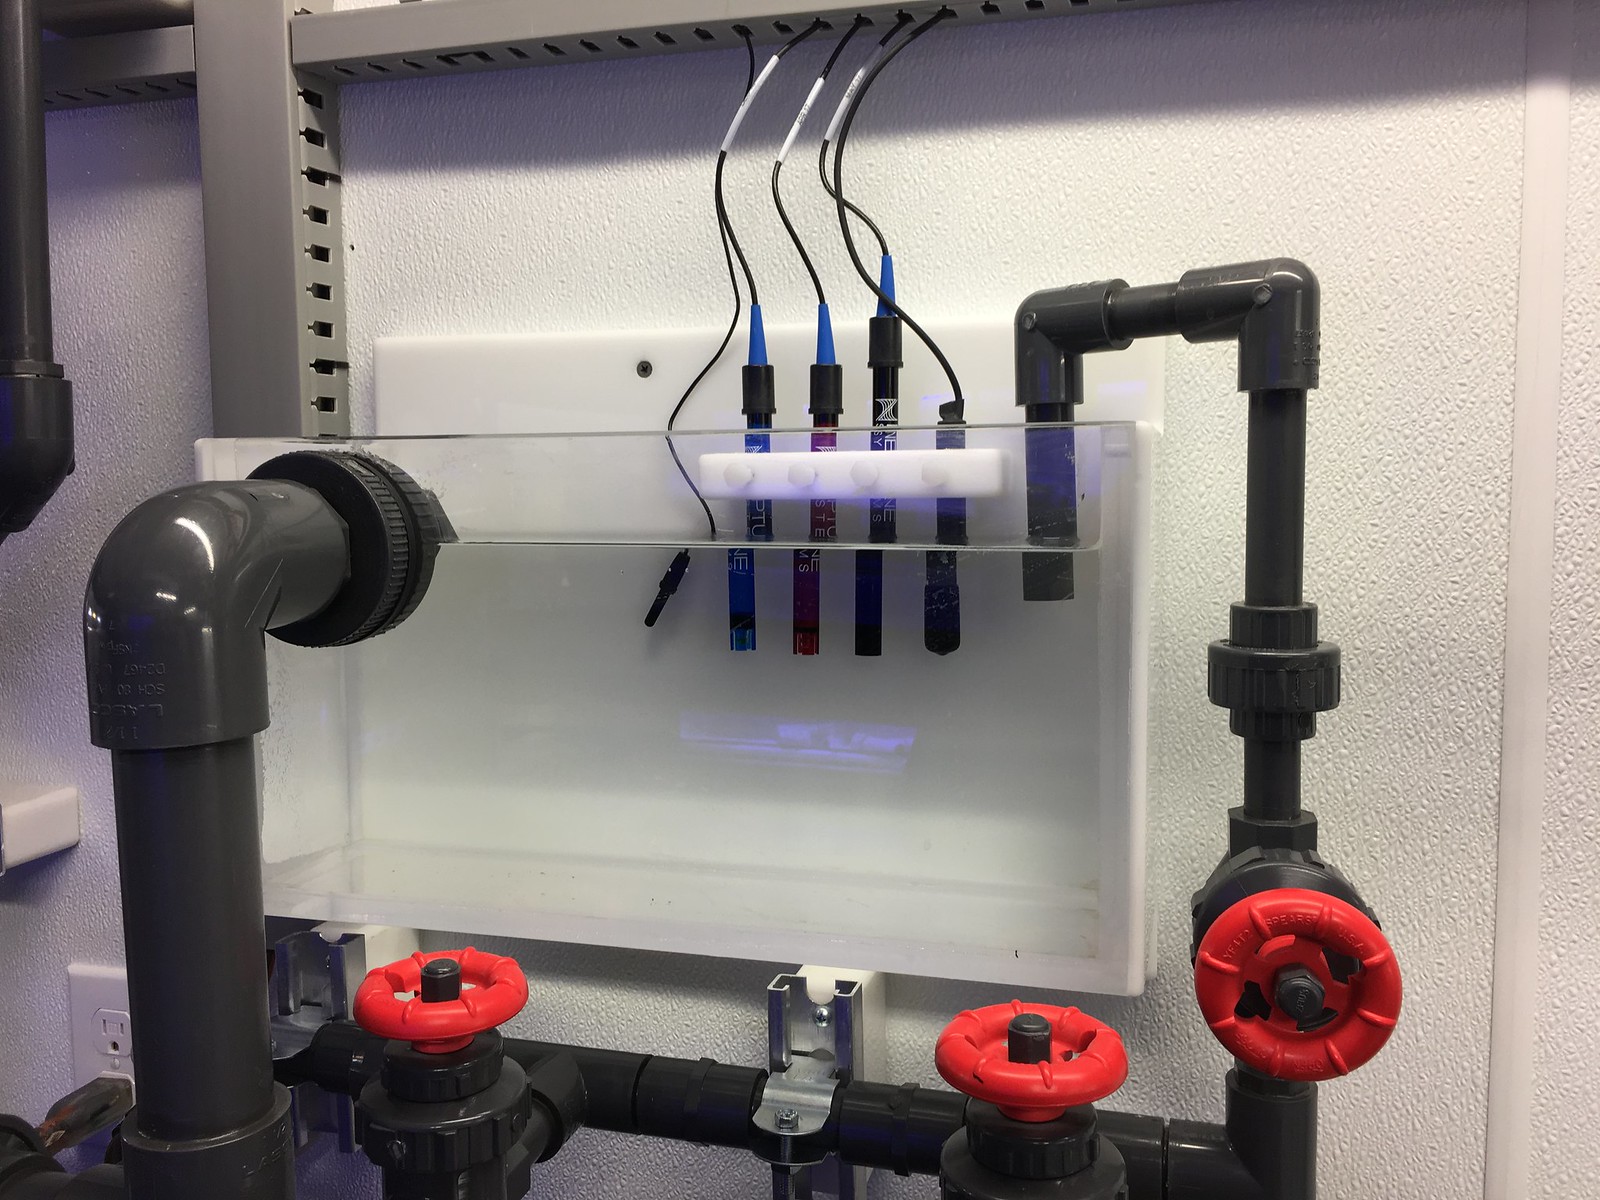
Thanks SynDen. That’s a great point. I had the same thought. The water supply comes from one of the two Dolphin pumps that serve as return to the display so it should be fairly representative of the tank’s water. With all of these various tanks hooked together, there is bound to be a little bit of lag in any change made. Kind of an aquarium’s version of Capacitance (term normally used in electronics).
I did make the flow adjustable into that box. I have played around with opening up that 1/2” gate valve fully and closing it down to a modest flow rate. With the cable open fully, the water in that box is being replaced fully at least once a minute (probably more rapildly than that). I compared the measurements and didn’t see any noticeable difference. I also compared the water temp readings with the probe in that box and with the probe directly in the sump’s main flow. No noticeable difference.
So, I’m fairly confident that it will provide a reasonable water testing point.
So is everything online? It looks awesome. I can't believe the amount of planning and time you took to build all of this. I have two questions. 1. When do you want to host a meeting? 2. What happens if you turn the power off? I worry about one tank one sump. I'd like to do something similar on a much smaller scale and I