Hi All, well after a brief hiatus from reef keeping while attending graduate school I've found myself once again drawn back into the aquarium world. I thought I would chronicle and share my build with all of you!
A Short History:
As I'm new to the Colorado reef keeping community I thought I would give a short introduction about how I got where I am today in the reef keeping world. My interest in aquariums started at a young age, like most I enjoyed my first freshwater aquarium but always had the itch to attempt the elusive saltwater "reef" aquarium. After convincing my parents that this was attainable I tore down our 75 gallon cichlid aquarium and converted it to a suitable reef aquarium back in 2008. From there my interest in aquariums and how different ocean ecosystems function only intensified. I was a dedicated member of the Marine Depot forums (for those of you who remember those days) where Eric Borneman, Ron Shimek, Anthony Calfo, and many others were active members helping disseminate accurate scientific information on how coral reef ecosystems worked and how to translate that into good aquarium practices. In the years since then I've been in and out of the saltwater aquarium trade in different capacities, everything from running aquarium stores to attending graduate school (studying Condylactis gigantea). I've helped set up, improve, and care for aquariums from 180-600 gallons and truly enjoy monster tank builds. However living in an apartment in Denver is not conducive to monster aquarium builds so I find myself looking at creating a humble custom made all in one (AIO) 40 breeder.
The Build:
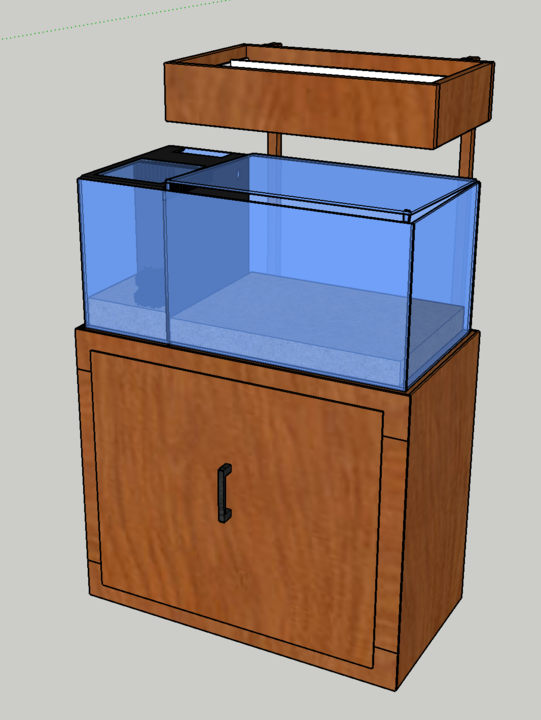
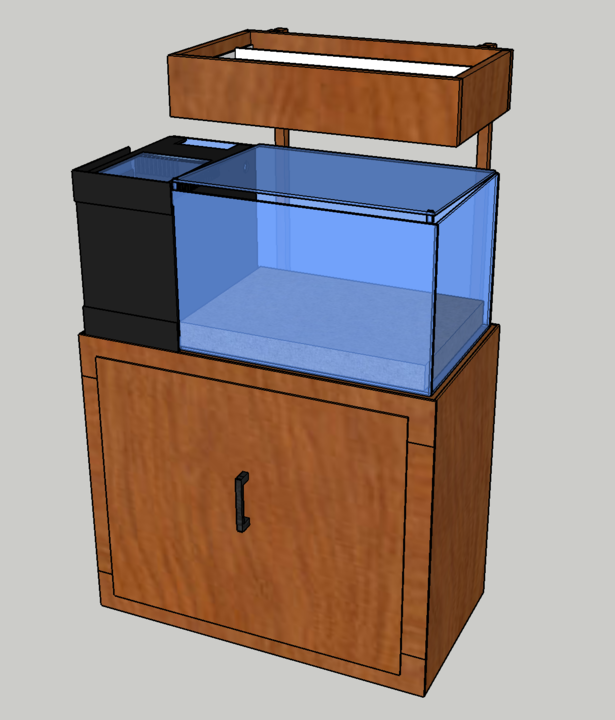
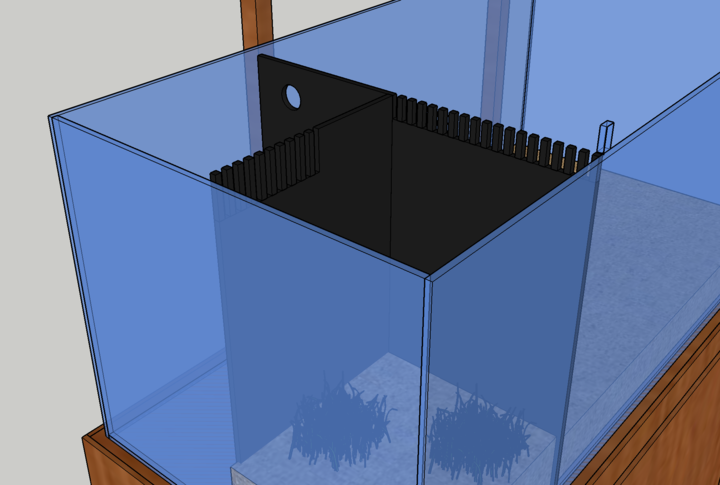
With the limitations of living in an apartment, moving, and the fear of leaking water I decided the best course of action would be a moderately sized all in one aquarium that allows me to keep spilled water to a minimum while also enjoying a few small fish and anthozoans along the way. I've always enjoyed the dimensions of a 40 breeder and decided that his would be the best route for me. I've partitioned this aquarium into 3 chambers, the refugium (seagrass bed), return area (with space for skimmer/carbon if needed), and the main display.

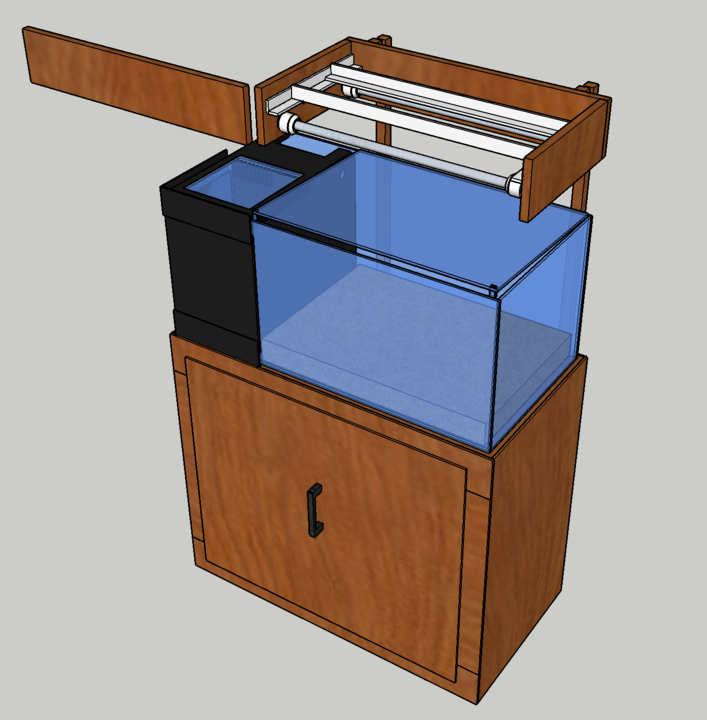
With the aquarium being located in a living room space I wanted to be able to block out the light so that guests, roommates, or myself can watch TV or enjoy time with others without the refugium light being a nuisance. To do this I thought I would add Velcro to a few pieces of acrylic to create a shade for the refugium that can be added when needed.

Equipment:
125W jager heater
Sicce 1.0 return pump
2 x AI Prime HD
2 x 24" T5
2 x Tunze 6055
Apex Classic Controller
Breakout box (for ATO system)
Power line Adapter set (to hard wire Apex to internet)
AquaKnight A029 (refugium LED)
I know most of this will be overkill for such a small aquarium, but knowing myself there will be an upgrade build within 2-2.5 years. With that in mind I figured I might as well go all in and buy for the upgrade of the future while I'm at it :grin:.
The canopy will house the lighting for the display section (T5s and AI Prime HDs)

I've learned over the years that there are many ways to keep reef aquariums and no one way is the "best way" as long as all the organisms are being kept healthy and happy. I prefer to use a more ecological approach by building up smaller flora and fauna and using them to "filter" the aquarium water. In sticking with that thought process I will have a seagrass bed as my dedicated form of nutrient export. This may not work as swimmingly as I hope so I left space in the return section of the sump for a small skimmer or carbon reactor as needed.

Finally, the progress thus far....

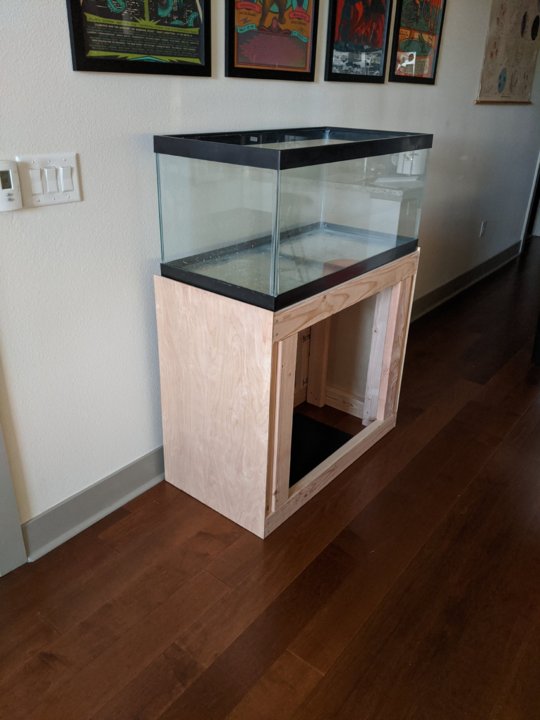
I'm working this weekend to finish skinning the stand with 1/4" laminated plywood, and hope to have acrylic cut by someone in the metro area to install later next week.
As always please feel free to share your thoughts and ideas! I'm always open to hearing others experiences and constructive criticisms on a project. If you have any questions on my thought processes please feel free to ask. Happy reefing!
A Short History:
As I'm new to the Colorado reef keeping community I thought I would give a short introduction about how I got where I am today in the reef keeping world. My interest in aquariums started at a young age, like most I enjoyed my first freshwater aquarium but always had the itch to attempt the elusive saltwater "reef" aquarium. After convincing my parents that this was attainable I tore down our 75 gallon cichlid aquarium and converted it to a suitable reef aquarium back in 2008. From there my interest in aquariums and how different ocean ecosystems function only intensified. I was a dedicated member of the Marine Depot forums (for those of you who remember those days) where Eric Borneman, Ron Shimek, Anthony Calfo, and many others were active members helping disseminate accurate scientific information on how coral reef ecosystems worked and how to translate that into good aquarium practices. In the years since then I've been in and out of the saltwater aquarium trade in different capacities, everything from running aquarium stores to attending graduate school (studying Condylactis gigantea). I've helped set up, improve, and care for aquariums from 180-600 gallons and truly enjoy monster tank builds. However living in an apartment in Denver is not conducive to monster aquarium builds so I find myself looking at creating a humble custom made all in one (AIO) 40 breeder.
The Build:
With the limitations of living in an apartment, moving, and the fear of leaking water I decided the best course of action would be a moderately sized all in one aquarium that allows me to keep spilled water to a minimum while also enjoying a few small fish and anthozoans along the way. I've always enjoyed the dimensions of a 40 breeder and decided that his would be the best route for me. I've partitioned this aquarium into 3 chambers, the refugium (seagrass bed), return area (with space for skimmer/carbon if needed), and the main display.
With the aquarium being located in a living room space I wanted to be able to block out the light so that guests, roommates, or myself can watch TV or enjoy time with others without the refugium light being a nuisance. To do this I thought I would add Velcro to a few pieces of acrylic to create a shade for the refugium that can be added when needed.
Equipment:
125W jager heater
Sicce 1.0 return pump
2 x AI Prime HD
2 x 24" T5
2 x Tunze 6055
Apex Classic Controller
Breakout box (for ATO system)
Power line Adapter set (to hard wire Apex to internet)
AquaKnight A029 (refugium LED)
I know most of this will be overkill for such a small aquarium, but knowing myself there will be an upgrade build within 2-2.5 years. With that in mind I figured I might as well go all in and buy for the upgrade of the future while I'm at it :grin:.
The canopy will house the lighting for the display section (T5s and AI Prime HDs)
I've learned over the years that there are many ways to keep reef aquariums and no one way is the "best way" as long as all the organisms are being kept healthy and happy. I prefer to use a more ecological approach by building up smaller flora and fauna and using them to "filter" the aquarium water. In sticking with that thought process I will have a seagrass bed as my dedicated form of nutrient export. This may not work as swimmingly as I hope so I left space in the return section of the sump for a small skimmer or carbon reactor as needed.
Finally, the progress thus far....

I'm working this weekend to finish skinning the stand with 1/4" laminated plywood, and hope to have acrylic cut by someone in the metro area to install later next week.
As always please feel free to share your thoughts and ideas! I'm always open to hearing others experiences and constructive criticisms on a project. If you have any questions on my thought processes please feel free to ask. Happy reefing!

 .
.